Greetings, fellow pet parents! Dr. Edward Hale here, your trusted veterinarian with 15 years of experience in the wonderful world of animal care and behavior. Today, I want to talk about a common scenario that many of you probably recognize: the daily dance of trying to get a harness on an eager, squirming, or even resistant dog. You know the drill – the excited wiggles, the head dives, the playful nips, or perhaps the anxious retreat. It can turn what should be a simple step towards a joyful walk into a frustrating wrestling match for both you and your furry friend.
A harness is an essential tool for many dogs. It offers better control, distributes pressure more evenly across their chest rather than their neck, and significantly reduces the risk of tracheal damage, especially for breeds prone to neck injuries or those with respiratory issues. For escape artists, anxious pups, or strong pullers, a well-fitting harness is truly a lifesaver, ensuring their safety during walks and adventures. But for all its benefits, getting it on smoothly shouldn't be a battle of wills.
My goal today is to equip you with the knowledge and practical tips, straight from my clinical experience, to transform harness time from a daily chore into a calm, cooperative, and even enjoyable routine. We're going to dive deep into teaching your dog to be still while putting on a harness, making the experience positive for everyone involved. Let's make every walk start with a smile, not a struggle!
Understanding Why Dogs Resist the Harness
Before we can teach our dogs to calmly accept their harness, it's crucial to understand why they might be resisting in the first place. It's rarely out of malice; usually, there's an underlying reason:
- Fear or Anxiety: For some dogs, especially those from shelters or with limited early socialization, the sensation of something being put over their head or wrapped around their body can feel threatening or restrictive. They might associate it with past negative experiences or simply be overwhelmed by the new sensation.
- Discomfort or Pain: A poorly fitting harness can pinch, rub, or restrict movement, causing actual physical discomfort. If a dog suddenly starts resisting a harness they once tolerated, always consider the possibility of an underlying injury or pain in their neck, shoulders, or chest area.
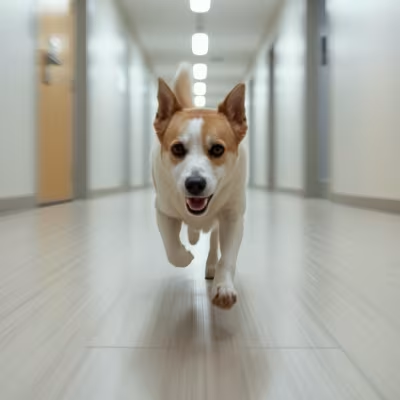
- Over-Excitement: Many dogs associate the harness with going for a walk, which is often the highlight of their day! Their excitement can make them wiggly, jumpy, and difficult to manage as they anticipate the adventure.
- Lack of Positive Association: If the harness is only ever brought out when it's time for a walk, and the process is rushed or stressful, the dog might develop a negative association with the object itself.
- Lack of Training: Quite simply, many dogs haven't been taught how to be still for the harness. They don't understand what's expected of them, and we, as their guardians, haven't shown them the calm, desired behavior.
Our approach must address these potential root causes, focusing on creating positive associations, ensuring comfort, and teaching specific, desirable behaviors. This is particularly important for teaching an anxious dog to accept a harness, where patience and gentle progress are key.
Pro Tip from Dr. Hale: Check the Fit!
Before you even begin training, take a moment to double-check your dog's harness fit. I've seen countless cases where a dog's resistance stemmed from a harness that was too tight, too loose, or rubbing in the wrong places. You should be able to comfortably slip two fingers under every strap of the harness. It shouldn't impede their shoulder movement, and the chest strap should sit below their throat, preventing choking. An ill-fitting harness is a significant contributor to solutions for dogs that fight the harness. If it's uncomfortable, no amount of training will make them like it!
Step-by-Step Guide: Making Harness Time a Positive Experience
Our goal is to create a positive emotional response to the harness and the act of putting it on. This involves breaking the process down into tiny, manageable steps and rewarding stillness and cooperation consistently. This is a comprehensive step-by-step guide to calm harness application.
The Foundation: Positive Association & Desensitization
Start by changing your dog's perception of the harness. It should signal good things, even before it touches them.
- Step 1: The "Harness Means Treats" Game.
Bring out the harness. Don't try to put it on. Just place it on the floor or a nearby surface. As soon as your dog looks at it, sniffs it, or even just exists calmly in its presence, give them a high-value treat (something they absolutely love – cooked chicken, cheese, etc.). Do this several times a day for a few days. The goal is for your dog to see the harness and think, "Yay! Treats are coming!"
Pro Tip: I often advise owners to leave the harness out in a common area for a few days, not hidden away. Let it become a neutral part of their environment, occasionally dropping treats near it even when you're not actively training. This helps normalize its presence.
- Step 2: Gentle Touch & Reward.
Once your dog is happy to see the harness, gently touch the harness to their side or back for just a second. Immediately give a treat. Repeat this a few times. Gradually increase the duration of the touch. If your dog pulls away, you've gone too fast. Go back to a shorter touch or just bringing the harness near them and rewarding.
Introducing the Harness: One Piece at a Time
Now we'll start introducing the actual mechanics of putting the harness on, piece by tiny piece, always rewarding stillness and cooperation.
- Step 3: The "Head Through" (If applicable).
For harnesses that go over the head: Hold the head loop open with one hand and a treat in the other, luring your dog's nose through the loop. As soon as their head goes through (even just a little bit initially), mark the behavior with a verbal cue like "Yes!" or a clicker, and give the treat. Then immediately take the harness off. Repeat this several times, gradually asking for their head to be fully through the loop before rewarding. The key here is rapid on, quick off, always ending on a positive note. This is crucial for how to train a puppy to stand still for harness, as their attention spans are short.
Pro Tip: If your dog is head-shy, you can start by holding the head loop near their nose, rewarding any calm curiosity. Slowly move the loop closer until they are comfortable enough to nudge their nose through for the treat.
- Step 4: The "Paw Through" (If applicable).
For step-in harnesses or those with leg loops: Guide one paw through the designated loop. As soon as the paw is through, mark and treat. Then take the paw out and the harness off. Repeat with the other paw. Only when they are comfortable with one paw should you try both. Remember, we're rewarding stillness during the action.
- Step 5: Clicking the Clasps.
Once your dog tolerates their head and/or paws going through, practice clicking one clasp. Click it, mark, treat, and immediately unclip. Repeat with all clasps. The sound of the clasp can be startling to some dogs, so we want to desensitize them to it.
The Full Application: Building Duration
Now we're ready to put it all together.
- Step 6: Full Harness On, Briefly.
Put the entire harness on. As soon as it's on and clipped, mark their stillness and give a high-value treat. Then, immediately take it off. The entire process should take only a few seconds. Do this several times in a session, keeping it short and positive. If your dog tries to move or struggles, stop, take the harness off, and restart the step you were on or even an earlier one. We only reward stillness.
- Step 7: Increase Duration & Positive Associations.
Gradually increase the time the harness stays on. Start with a few seconds, rewarding continuously for stillness. Then, leave it on for 30 seconds, then a minute, and so on. During this time, make sure something good happens: offer more treats, play a quick game, give a relaxing belly rub. Don't just put it on and stand there; make it active and positive. This is how we achieve positive reinforcement for harness training.
Pro Tip: Practice putting the harness on and taking it off when you're NOT going for a walk. This helps decouple the harness from the intense excitement of "walkies" and allows your dog to practice being calm. I call this the "harness party" – put it on, give a treat, take it off. Repeat.
- Step 8: Practice in Different Contexts.
Once your dog is calm with the harness indoors, practice in slightly more distracting environments. Start in a quiet part of your yard, then perhaps near the door, and eventually outside. Always return to easier steps if your dog struggles.
Common Mistakes to Avoid When Teaching Harness Stillness
Even with the best intentions, it's easy to fall into habits that can hinder your progress. Be mindful of these common pitfalls:
- Rushing the Process: This is by far the most common mistake. Every dog learns at their own pace. Forcing them through steps too quickly will only create more resistance and anxiety. Patience is paramount.
- Forcing or Pinning Your Dog: Never physically force the harness onto your dog or pin them down. This will only erode trust and create a strong negative association, potentially leading to fear-based aggression.
- Only Putting the Harness on for Walks: If the harness always means an exciting walk, your dog will naturally become overstimulated. Practice putting it on during calm times, then taking it off without a walk.
- Punishing Resistance: Yelling, scolding, or using a harsh tone when your dog resists will make them associate the harness with punishment, not pleasure. Always maintain a positive, encouraging tone.
- Inconsistent Training: If one family member uses positive reinforcement and another tries to rush or force the harness, your dog will become confused and progress will be stalled. Everyone in the household needs to be on the same page.
- Ignoring Body Language: Pay close attention to your dog's signals. Lip licking, yawning, looking away, tucking their tail, or trembling are all signs of stress or discomfort. If you see these, you've gone too far, too fast.
Pro Tips from Dr. Edward Hale for Stillness Success
Here are some additional insights I've gathered over the years to help you achieve success in teaching your dog to be still for harness application:
- High-Value Rewards are Non-Negotiable: This isn't the time for dry kibble. Use treats your dog goes absolutely wild for – soft, smelly, and easy to chew quickly. Cooked chicken, tiny pieces of cheese, hot dogs, or liver paste are often excellent motivators.
- Location, Location, Location: Always start training in a quiet, low-distraction environment. A calm room where your dog feels safe is ideal. As they become more proficient, you can gradually introduce distractions.
- The Power of a "Relax" Cue: If you've already trained a "settle" or "relax" command, you can incorporate it. Ask your dog to "settle" before you even pick up the harness. Reward heavily for holding the position.
- Consider a Different Harness Style: If your dog absolutely despises an over-the-head harness, try a step-in style. Some dogs find certain designs less intrusive than others. There's a vast array of harness types out there; don't be afraid to experiment to find what's most comfortable for your dog. This is a practical tip for what to do when my dog squirms during harness put-on.
- Lick Mats or Stuffed Kongs: For dogs who are still a bit anxious but cooperative, you can offer a stuffed Kong or a lick mat smeared with peanut butter (xylitol-free!), cream cheese, or wet food while you put the harness on. This provides a distraction and reinforces a positive experience.
- Short, Frequent Sessions: Five-minute training sessions, two to three times a day, are far more effective than one long, drawn-out session. End on a positive note before your dog gets bored or frustrated.
When to See a Vet
While most harness resistance can be resolved with patient, positive training, there are times when a visit to your veterinarian, like myself, is absolutely necessary:
- Sudden Onset of Resistance: If your dog has always been fine with their harness and suddenly starts resisting, showing pain, or even growling, this is a red flag. It could indicate an underlying injury, muscle strain, joint pain (especially in the neck, shoulders, or back), or a skin issue.
- Aggression or Biting: If your dog snaps, growls, or tries to bite when you approach with the harness, this suggests significant fear, pain, or discomfort. This is not just a training issue; it requires a professional assessment to rule out medical causes and develop a safe behavior modification plan.
- Excessive Licking or Chewing the Harness Area: After the harness is on or removed, if your dog is constantly licking, chewing, or scratching at the areas where the harness sits, it could indicate skin irritation, an allergic reaction, or discomfort from the harness itself.
- Persistent Anxiety or Fear: Despite consistent and gentle positive reinforcement, if your dog remains highly anxious, panicky, or fearful during harness application, it's worth discussing with your vet. We can rule out medical issues and refer you to a certified professional dog trainer or veterinary behaviorist for specialized support.
- Limping or Gait Changes: If you notice any limping, stiffness, or changes in your dog's gait after wearing the harness, particularly if it's new or fits differently, this needs veterinary attention immediately.
As your veterinarian, my priority is always your pet's health and well-being. Never hesitate to reach out if you have concerns.
Frequently Asked Questions About Harness Training
Q1: My dog gets incredibly excited when they see the harness, making it hard to put on. How do I calm them down?
A: This is a common and wonderful problem! Your dog clearly loves walks. The key is to decouple the harness from the immediate walk. Practice putting the harness on and taking it off at random times throughout the day when you're NOT going for a walk. Reward calm behavior generously. You can even try picking up the harness, putting it down, picking it up again, then leaving it on the counter without going anywhere. This desensitizes them to the object itself. Only proceed to put it on when they are relatively calm, and reward that calmness. The "harness party" technique I mentioned earlier is perfect for this.
Q2: How long does this training take?
A: The honest answer is: it varies greatly! For a confident puppy with no prior negative experiences, it might take a few days to a week of consistent, short sessions. For an adult dog with significant anxiety or a history of resistance, it could take several weeks or even months of patient, gradual work. The important thing is to celebrate every small victory and never rush the process. Consistency and patience are your best friends here. Don't worry about the timeline; focus on making each step a positive experience for your dog.
Q3: What if my dog tries to bite or chew the harness while I'm putting it on?
A: If your dog is mouthing or gently biting the harness, it could be a sign of playfulness, frustration, or mild anxiety. Redirect this behavior immediately by offering a high-value treat as soon as their mouth is off the harness, or offer a toy for them to hold. If the biting is more aggressive, you've likely moved too fast, and they're expressing significant discomfort or fear. Stop immediately, go back to an earlier, easier step where they were comfortable, and consider consulting with a certified professional dog trainer or veterinary behaviorist. Never punish biting, as it can escalate the behavior.
Q4: Can I use this method for puppies?
A: Absolutely! In fact, starting early with puppies using this positive reinforcement method is ideal. It lays a strong foundation for a lifetime of stress-free harness application. Puppies are often more open to new experiences, but their attention spans are shorter, so keep your sessions very brief (1-2 minutes) and full of delicious treats and praise. This approach is highly effective for teaching an anxious dog to accept a harness as well as the youngest members of our canine families.
Conclusion: The Path to Peaceful Walks
Learning to calmly accept a harness is more than just a convenience; it's a foundational step towards safety, comfort, and positive experiences for your dog. By understanding the "why" behind their resistance, breaking the process into tiny, rewarding steps, and exercising boundless patience, you can transform harness time into a calm and cooperative routine. Remember, you're not just teaching a dog to wear a harness; you're strengthening your bond, building trust, and showing them that new experiences can be positive and safe.
I hope these insights and practical tips from my years in veterinary practice empower you to embark on this training journey with confidence and kindness. Happy training, and here's to many wonderful, stress-free walks ahead!
Sincerely,
Dr. Edward Hale
Certified Veterinarian & Animal Behavior Expert


0 Comments
No comments yet. Be the first to share your thoughts!
Leave a Comment