Hello fellow pet parents! Dr. Edward Hale here, your trusted veterinarian with 15 years of experience in helping families and their furry companions live happier, healthier, and safer lives together. Today, we’re going to tackle a topic that’s incredibly close to my heart, and frankly, one that could save your dog’s life: teaching your dog to wait patiently at the curb before crossing the street.
I’ve witnessed firsthand the heartbreak and trauma that can result from a beloved dog darting into traffic. It’s a terrifying scenario no owner ever wants to experience. But the good news is, with patience, consistency, and the right approach, you can equip your dog with this vital life skill. This isn't just about obedience; it's about instilling a fundamental layer of safety that empowers both you and your canine companion to navigate the world confidently. Let's explore how to implement effective curb manners for dogs and ensure their safety on every walk.
Why Curb Waiting Is Non-Negotiable for Your Dog's Safety
Think about it: our urban and suburban landscapes are full of potential hazards for dogs. Cars, bicycles, scooters, and even other pedestrians can pose a risk if your dog isn't trained to stop and wait. Teaching your dog to wait at the curb is more than just a trick; it's a critical safety measure that provides immense benefits:
- Accident Prevention: This is the most obvious and important reason. A trained "wait" at the curb can literally be the difference between life and death, preventing your dog from running into oncoming traffic. It's the cornerstone of dog street safety training tips.
- Peace of Mind: Imagine walking your dog without the constant anxiety that they might suddenly pull or bolt into the street. Knowing your dog will reliably stop at the edge of the road allows you both to enjoy walks more fully.
- Enhanced Control: This training strengthens your overall control and communication with your dog, making other aspects of training easier and reinforcing your bond. You’ll be able to confidently execute reliable street crossing behavior for dogs.
- Compliance with Laws: Many areas have leash laws for a reason. This training ensures your dog remains safely under your control, preventing potential fines or liability issues.
- Building Good Habits: The discipline learned here extends to other areas, helping your dog understand boundaries and respond better to your cues in various situations.
Prerequisites for Successful Curb Training
Before we dive into the step-by-step process, it's essential to ensure your dog has a solid foundation. These prerequisites will make the curb training much smoother and more effective:
Basic Obedience Skills
Your dog should ideally have a good grasp of "Sit," "Stay" (or "Wait"), and "Look at Me." These commands form the building blocks for curb waiting. A reliable "Stay" is essentially what we're aiming for at the curb.
Loose-Leash Walking
If your dog is constantly pulling you on the leash, it will be incredibly difficult to teach them to stop at the curb. Practice loose-leash walking in quiet areas first. A dog that is already responsive to leash pressure and walks politely beside you is much more prepared for this advanced training.
Appropriate Gear
Invest in a sturdy, non-retractable leash (4-6 feet is ideal) and a comfortable, well-fitting flat collar or a front-clip harness. Retractable leashes offer less control and can be dangerous in situations where you need to quickly stop your dog. For strong pullers, a front-clip harness can redirect their momentum and make communication clearer without putting strain on their neck.
High-Value Rewards
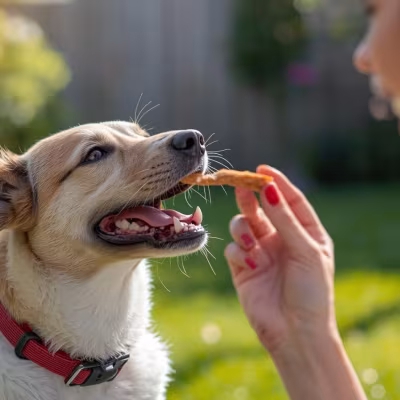
Have plenty of high-value treats on hand – these are treats your dog absolutely loves and doesn't get often (e.g., small pieces of cooked chicken, cheese, or specialized training treats). These will be crucial for positive reinforcement.
Patience and Consistency
Training takes time, especially when dealing with outdoor distractions. Be prepared for setbacks and celebrate small victories. Consistency is paramount; everyone in the household should use the same commands and methods.
The Step-by-Step Guide: Teaching Your Dog to Wait at the Curb
This process builds upon itself, moving from low-distraction environments to real-world scenarios. Remember to keep sessions short, positive, and fun!
Step 1: Master "Wait" (or "Stay") Indoors
Before tackling the curb, your dog needs to understand the concept of "Wait" in a controlled environment. This foundational skill will make teaching how to train a dog to stop at the street much easier.
- Start Simple: In a quiet room, ask your dog to "Sit." Then, with an open palm facing them, say "Wait" (or "Stay").
- Take One Step Back: Take one small step away from your dog. If they remain sitting, immediately step back to them and reward with a treat and praise.
- Gradually Increase Distance and Duration: Slowly increase the number of steps you take away, and the amount of time you ask them to wait. Always return to them before they break the wait to reward.
- Add a Release Cue: After they've waited and been rewarded, give them a clear release cue like "Okay!" or "Free!" This teaches them that the "Wait" command has an end.
- Practice with Distractions: Once proficient, introduce mild distractions like someone walking by, or dropping a toy a short distance away. Only progress when they can reliably hold the wait.
Step 2: Introduce "Wait" at Thresholds (Doors/Gates)
This bridges the gap between indoor training and outdoor application. Use your front door or gate as a practice curb.
- Leash Up: Put your dog on their leash. Approach the door/gate.
- Ask for "Wait": Just before opening the door, ask your dog to "Sit," then "Wait."
- Open Slowly: Start by just touching the doorknob. If they remain, reward. Then, slowly open the door a crack. If they hold the "Wait," reward. Gradually open the door wider and wider.
- No Rushing Out: If your dog tries to bolt, immediately close the door (or block the exit with your body) and reset. Ask for "Sit" and "Wait" again. Only proceed when they stay.
- Release: Give your release cue ("Okay," "Let's Go!") once the door is fully open and they are calm. Walk out together. This helps to prevent dog from darting into road from your property.
Step 3: Taking it to the Curb – The Initial Approach
Now, we'll take our training outdoors to a real curb, but start in a very quiet, low-traffic area.
- Choose Your Spot Wisely: Pick a residential street during off-peak hours where there's minimal traffic.
- Approach the Curb: Walk towards the curb on your dog's side (typically your left). As you get within a few feet of the edge, slow your pace.
- "Wait" and "Sit": Just before your dog reaches the actual edge of the curb, say "Wait" and ask for a "Sit." Use gentle leash pressure upwards if needed to guide them into a sit.
- Immediate Reward: The instant their rear touches the ground in a sit at the curb, mark the behavior with a verbal marker ("Yes!" or "Good!") and provide a high-value treat and praise. You want to reward the action of stopping at the curb.
- No Crossing Yet: For these initial sessions, don't worry about crossing. Just practice approaching the curb, stopping, sitting, and getting rewarded. Then, release them and turn around, walking away from the curb. Repeat several times.
Step 4: Reinforcing the "Wait" at the Curb
Once your dog reliably stops and sits at the curb upon your cue, it's time to increase the duration of the wait.
- Increase Duration: After your dog sits at the curb, ask them to "Wait." Start by waiting for just 1-2 seconds before rewarding. Gradually increase the duration to 3 seconds, then 5, then 10, and so on.
- Stay Engaged: While they are waiting, maintain eye contact and occasionally offer small, quick treats to reinforce the hold.
- Vary Locations: Practice at different quiet curbs, introducing slight variations in the environment. This helps generalize the behavior. This is crucial for strengthening your dog's curb manners for dogs.
Step 5: Adding the Release Cue and Crossing
This is where it all comes together. Your dog learns that "Wait" means "do not move until I say so."
- Check for Traffic: When your dog is patiently waiting at the curb, actively look both ways for traffic. Make this a visible cue for your dog.
- Give Your Release: Once it's safe and clear, give your distinct release cue ("Okay!", "Let's Go!", "Cross!"). Step forward purposefully, inviting your dog to walk with you across the street.
- Reward After Crossing: Do not reward your dog while they are crossing. Reward them with praise and a treat after you have both safely reached the other side. This reinforces the entire sequence: wait, cross safely, then reward.
- Crucial Correction: If your dog breaks the "Wait" before your release cue and tries to step into the street, immediately stop, say "Ah-ah!" (or a similar gentle interrupter), and take a step back from the curb. Reset the situation: ask for a "Sit" and "Wait" again, and only proceed once they perform it correctly. The consequence of breaking the wait is not getting to cross. This teaches them that pulling across the road simply doesn't get them what they want. It’s the best way to stop dog pulling across road.
Step 6: Introducing Distractions and Generalization
As your dog becomes more proficient, gradually introduce more real-world distractions.
- Increase Busy-ness: Slowly move to slightly busier streets. Start during quieter times of day and gradually increase the challenge.
- Vary Distractions: Practice when other people are walking by, when bikes are passing, or when other dogs are in the vicinity. You can even enlist a friend to walk past you during training.
- Maintain High Reinforcement: In highly distracting environments, use your highest-value treats to ensure your dog stays focused and motivated.
- Proofing: Practice in different weather conditions, with different people handling the leash, and in various neighborhoods. The goal is for your dog to perform the "Wait" consistently, no matter the circumstances. This is how you truly teach dog curb waiting safety for any situation.
Common Mistakes to Avoid
Even with the best intentions, errors can creep into training. Be mindful of these common pitfalls:
- Inconsistency: This is the number one destroyer of training. If you sometimes let your dog pull across the street, and other times enforce the "Wait," your dog will become confused and the behavior won't stick. Every curb, every time.
- Using a Retractable Leash: These leashes provide too much slack and not enough control, making it incredibly difficult to effectively communicate and enforce a "Wait." Stick to a standard 4-6 foot leash.
- Rushing the Process: Trying to go from indoor "Wait" to busy street crossings too quickly will set your dog up for failure and frustration. Take your time with each step.
- Forgetting the Release Cue: Your dog needs to know when it's okay to move. Without a clear release, they'll be guessing, leading to anxiety or anticipating the wrong moment.
- Punishment-Based Training: Yelling, yanking on the leash excessively, or other harsh corrections can create fear and anxiety, damaging your bond and making your dog less likely to respond to your cues in stressful situations. Focus on positive reinforcement.
- Not Setting Your Dog Up for Success: Starting in an overly stimulating environment when your dog hasn't mastered the basics is unfair and unproductive. Build confidence gradually. This often leads to issues like a dog that consistently tries to prevent dog from darting into road because they haven't learned to wait.
Pro Tips from Dr. Hale's Clinical Experience
- Start Young: While old dogs can learn new tricks, puppies are sponges! The earlier you introduce curb safety, the more ingrained it will become. Incorporate short, fun training sessions into their daily walks from the start.
- The Power of the Front-Clip Harness: For dogs prone to pulling, a front-clip harness can be a game-changer. It redirects their forward momentum, making it much easier to guide them and communicate your desire for them to stop. It's a gentler alternative to neck collars for controlling strong pullers.
- "Emergency Stop" Cue: In addition to "Wait," consider teaching a distinct "STOP!" or "HALT!" cue specifically for urgent situations. Practice this in a safe, controlled environment (like a long line in a park) so it becomes an instant, non-negotiable command. This can be invaluable if a leash slips or an unexpected hazard appears.
- Your Body Language Matters: Dogs are incredibly attuned to our emotions. If you're tense and anxious approaching the curb, your dog will pick up on that and may become anxious or reactive themselves. Breathe, stay calm, and project confidence. Your calm demeanor communicates safety.
- Vary Your Rewards: While treats are fantastic, don't forget other forms of reinforcement. A quick game of tug or a thrown favorite toy after safely crossing the street can be a powerful reward, especially for play-motivated dogs. Keep them guessing and engaged!
- Always Have Your "Pocket Rocket" Treats: Seriously, always have a small baggie of super high-value treats on you during walks. You never know when you'll have a perfect training moment or need to reinforce an unexpected good behavior.
When to See a Vet or Professional Trainer
While this guide provides a comprehensive framework, there are times when professional intervention is necessary and beneficial. Don't hesitate to reach out if:
- Excessive Anxiety or Fear: If your dog shows extreme fear, panic, or phobia when approaching streets or during training, it could indicate underlying anxiety that needs addressing. A veterinary behaviorist can help diagnose and manage such issues.
- Sudden Behavioral Changes: If your dog suddenly becomes aggressive, unusually fearful, or completely loses focus during training, it might be a symptom of an underlying medical condition or pain. A vet check-up is crucial to rule out physical causes.
- Physical Limitations: Dogs with conditions like severe arthritis, impaired vision or hearing, or neurological issues may struggle with specific physical commands or become disoriented. Your veterinarian can assess their physical capabilities and recommend adaptations.
- Aggression or Reactivity: If your dog lunges, barks, or shows aggression towards people, other dogs, or vehicles, addressing these issues with a certified professional dog trainer (CPDT-KA) or veterinary behaviorist should take precedence before attempting advanced curb training in distracting environments.
- Lack of Progress: If you've been consistently following the steps and feel stuck, or if your dog isn't making progress, a professional trainer can observe your interactions, identify specific challenges, and provide tailored strategies. They can offer invaluable insights into how to train a dog to stop at the street effectively.
Frequently Asked Questions (FAQ)
Q1: My dog gets too excited at the curb and won't focus. What should I do?
A: Excitement often stems from over-stimulation. Go back to a less distracting environment, like your driveway or a very quiet street. Keep sessions very short (2-5 minutes). Use your highest-value treats and engage them with your "Look at Me" command before asking for a "Wait." If they're too excited to even sit, walk away from the curb, calm them down, and re-approach.
Q2: How long does it typically take to teach a dog to wait at the curb?
A: The timeline varies significantly depending on your dog's age, prior training, temperament, and your consistency. Some dogs might grasp the concept in a few weeks, while others could take several months to achieve reliable, distraction-proof behavior. Patience and daily practice are key.
Q3: Can I teach an older dog to do this, or is it just for puppies?
A: Absolutely! While puppies often learn faster, older dogs are fully capable of learning new behaviors. It might take a bit more patience and consistency to overcome established habits, but an older dog can certainly learn to wait at the curb safely. Their mental engagement and safety are equally important.
Q4: My dog sometimes breaks the 'wait' command and tries to step into the street. How do I correct this without being harsh?
A: The most effective correction is to prevent them from getting what they want (crossing the street). If your dog breaks the "Wait," immediately say "Ah-ah!" or "Nope!" in a calm, firm tone, then swiftly take a step or two back from the curb. Re-establish the "Sit" and "Wait" command. Only when they comply correctly do you then give the release cue and cross. This teaches them that breaking the wait means delaying the crossing. Consistency with this consequence is vital to stop dog pulling across road prematurely.
Conclusion
Teaching your dog to wait at the curb is one of the most important investments you can make in their safety and your peace of mind. It’s a foundational skill that protects them from countless dangers and strengthens the trust between you. Remember, training is a journey, not a destination. Celebrate every small victory, stay patient, and always prioritize positive reinforcement.
As your trusted veterinarian, I’ve seen firsthand the profound impact this training can have. It’s a gift of safety that lasts a lifetime. So, grab those high-value treats, head out to a quiet curb, and start building this invaluable skill. Your dog will thank you for it, and you'll enjoy your walks together with a renewed sense of confidence and joy. Happy training!
0 Comments
No comments yet. Be the first to share your thoughts!
Leave a Comment